Showing posts with label how to draw. Show all posts

Friday, July 31, 2020

Drawing for Fun with Black, White, Brown and Grey Conte Pastels on Tan Paper

Using pastel pencils is very different from colored pencils.


Pastels are much softer, can cover an area much faster, and are super dusty. They do not hold a point as long as a colored pencil, and need to be sharpened often. They can create very painterly looks with a more controlled feel.

In the video below I am coloring this printed ink image of a hummingbird using only four colors. Please feel free to download and work along with me if you like. Enjoy!

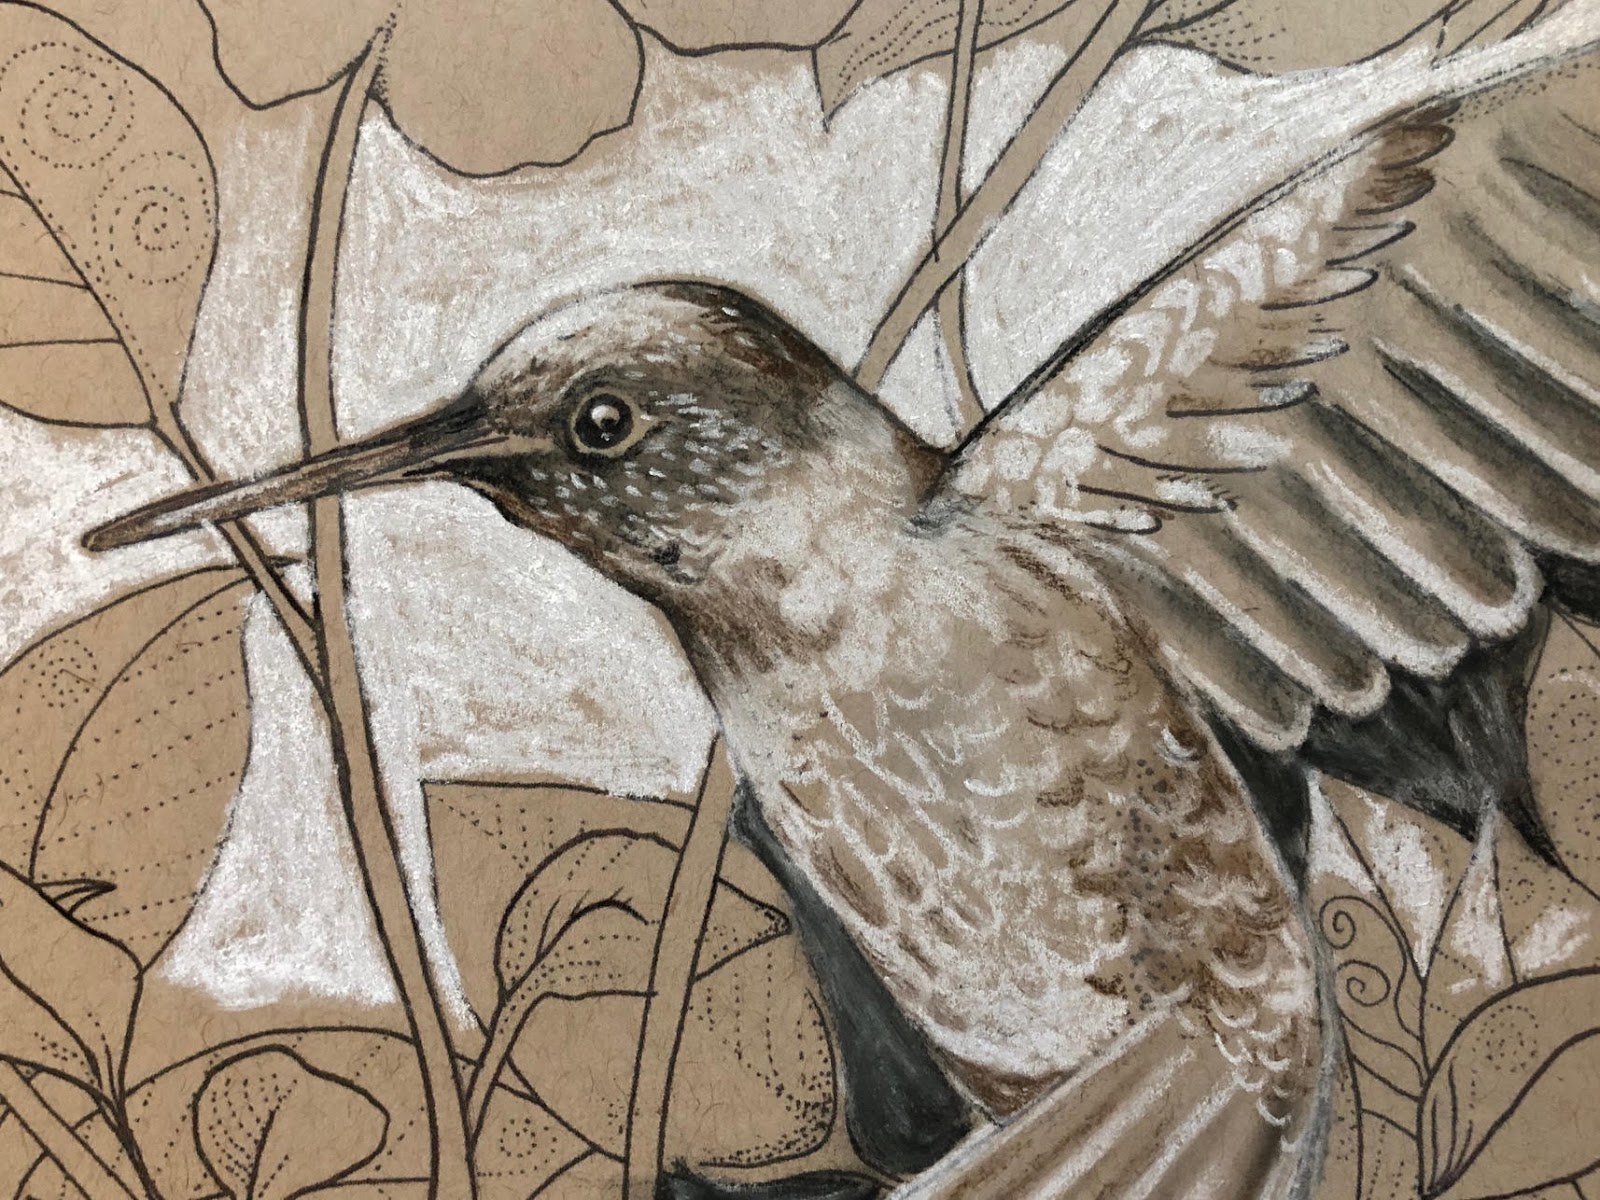
                                       CLICK HERE to download hummingbird to draw along!


Here's the video! All items I mentioned are listed here and under the video. Click below to watch.
Conte Pastel Pencils:  https://amzn.to/3fhV4RG
Strathmore Tan Toned Paper: https://amzn.to/30k004u
Strathmore Tan Tone Paper (Smaller Pad):  https://amzn.to/3hVrx1R
Conte Sharpener:  https://amzn.to/2EvlliH
Starter Brushes:  https://amzn.to/3k0t9ta
Coloring Dreams Coloring Book (more pretty images):  https://amzn.to/3gp8tJi


Thanks for stopping by! xo

Sunday, November 26, 2017

SCHPIRERR FARBEN Colored Pencil Review and Marble Drawing

This 72 set of colored pencils by Schpirerr Farben was a delightful surprise.

With a price point of approximately $27 for 72 pencils, I did not have high expectations. But I am happy to report that I was very wrong.

They come in a sturdy tin and are housed in three easily removable trays. They are oil based and the colors are identifiable by number. 

The pencils are the approximate diameter of Prismacolor pencils, and feel like a combo of of Prismas and Polychromos. I did a review of the pencils in the video below as I drew and colored an orange glass marble, and had to use many layers. There was no build up, and I love the way the image turned out.


I had no problem sharpening the pencils. They have the feel of a more expensive pencil.

I am looking forward to using these pencils again, and I hope you consider using them. You can purchase from the link on right >>>

Saturday, December 31, 2016

Drawing and Coloring Realistic Water Drops in Line and Greyscale

Here is a video that shows how to draw realistic water droplets.


You can add them anywhere on your coloring page as a fun and whimsical addition.

I used a BIC Pencil Xtra Life, Medium Point (0.7 mm), 5-Count (Even the eraser is good!)


I also used the Tombow MONO Zero Eraser Value Pack, Round 2.3 mm (I LOVE this mechanical eraser! Buy it now :)


The image is from my book COLORING DREAMS. It has 14 painterly one sided images and no repeat patterns.


To just purchase the greyscale image shown in the video click HERE.

So as you can see the materials you need are super basic. The video is straightforward and I think you will find it simple and easy enough to recreate the images.

Have fun and happy drawing!

Here is the final product, drawn by me, colored by the wonderfully talented colorist Ronda Francis. Thanks Ronda! <3 font="">


Sunday, December 18, 2016

Accidental Coloring Discovery with Tombow Pens and Faber Castell Pencils

I love happy accidents.

Today I discovered that working with Tombow watercolor markers and colored pencils, Faber-Castell Poychromos pencils to be specific, is a match made in heaven.

If you put down a layer of color with the Tombow pens and wait about a minute for it to dry, you can color over the top with colored pencils. This allows for subtle shading and detailing which can be a problem when using markers alone.

I also went over the top of the whole thing with a Uni-ball Signo white pen. This also worked well.

Here is a quick video with a demo. Stay tuned--I'll be doing a whole picture soon.

Have a great weekend!

xo


Wednesday, October 26, 2016

Learn to Draw and Color a Realistic Water Droplet

Happy November everyone! 

Here is a video tutorial, How to Draw and Color Realistic Water Droplets. Hope you like it.


If you would like to download an image an image to color from Etsy ($.99) click HERE . 


The entire book, COLORING DREAMS is also downloadable on Etsy right HERE

On Sundays at 3pm EST please pop over to my FACEBOOK page for weekly color alongs.

Bring colored pencils, a fine line marker or pen, and and eraser.

Hope to see you there.

xo


Wednesday, September 7, 2016

Coloring with Faber Castell Pencils and Lolliz Gel Pens

Here is a video using a combo of Faber Castell Pencils and Lolliz Gel Pens in the book COLORING DREAMS.

I chose the page I did because there is a lot of white space in the flower and hummingbird, and I wanted to show how to enhance larger and somewhat empty spaces.

I used the gel pens to add highlights and detail for the most part.

Enjoy!


Sunday, May 1, 2016

Congratulations CORRINA LORRAINE! Winner of the Coloring Dreams Giveaway!

I am happy to announce the winner of the Coloring Dreams giveaway is CORRINA LORRAINE!

She will receive the first copy of Coloring Dreams, and a 24 set of Prismacolor pencils.


Please stay tuned! Coloring Dreams is the first book in The Coloring Club, where members receive a beautiful coloring book by artist Dea Lenihan delivered right to the front door, along with an art supply that is suited to the book of the month. 

So once again--CONGRATULATIONS CORRINA!

P.S. Please keep on eye on your email--everyone that entered is getting a small gift from me. 

xo Dea


Tuesday, January 26, 2016

Creepy Honeymoon Drive and How to Draw a Big-Eyed Frog

My parents celebrated their 55th anniversary this week. When asked about their most fond memories, the first thing they talked about was their drive from New Jersey to Florida. 

They were going to stay at a friend's hotel for their honeymoon, and they decided to drive the whole way. 

First of all, the bridge going through Savannah was covered in ice, and they were one of the last vehicles allowed through. The policeman directing traffic saw their Jersey plates and assumed they could handle it. 

As it got darker, they entered the Okefenokee swamp. They told me they were surrounded by moss covered trees, swamp grass, and the roads were covered with over a foot of water in some places. By the time it was completely dark they were so into the swamp that there were no street lights. 

They kept going anyway. 


After driving for what seemed to be forever, and listening to unusual night noises including what sounded like a very large frog, they saw a light in the distance. 

When they got close enough they could see it was one light bulb hanging from a wire, illuminating a toll booth.


They paid their dime, found out they were indeed going in the right direction, and found the next creepy little roadside inn. They spend the night, woke to see a giant swamp behind the motel, and continued on their journey.

Happily, when they finally got to their honeymoon destination the lodging was lovely and they had a wonderful time.

So in honor of their great adventure I decided this week to draw the Okefenokee frog.

Hope you have fun drawing him.

Don't forget to enter the JETPENS brush pen giveaway! It ends this Sunday. You can sign up HERE to win. Frogs were drawn with the TOMBOW brush pen from the set.

xo

This week learn to draw a Big Eyed Frog. Have fun!


Here is another image from The Open Pillow.


Friday, January 15, 2016

Be Yourself ~ Not As Easy As It Sounds in the ART World (And How to Draw a Grumpy Bunny)

The internet has made what Disney called a small world even smaller. We get information in the blink of an eye, and we are exposed to far more than any other time in history.

We can get news from the other side of the globe faster than if your neighbor ran over from next door. What was once underground and very hard to see can now be considered mainstream. 


The web has leveled the art playing field somewhat--what was once relegated to a very select group can now be viewed by millions with the right amount of retweets or shares.

We see hundreds if not thousands of images a day as visual artists. We are lucky enough to look at the work of our peers, and in a matter of seconds we can find millions of images to help as reference points for our work.

Looking at other beautiful artwork can certainly elevate our practice, but I feel it can't help but influence our style, too. When we see a color combination we love we get excited and want to try and incorporate it into our work too. A new medium can have us running to the store so we can try it at home.

It is hard enough to develop a style that is recognizable yet unique, and now we have to contend with the daily hyper-viewing of images.

I am not complaining! I love the web and I love that I can see all the lovely art I could I ever dream of. But I am just a tad more aware of the fact that I need to stay true to me and my style, and not get seduced by something bright and shiny.

Every Friday I will be sharing a video that is geared towards helping kids learn to draw. I will be demonstrating in a way I liked to learn as a child--with fun and fancy images that are easily repeated and not too complicated. This week it is the grumpy bunny from the image above.


Please feel free to share this post or video with any artistic little ones you may know.

This is an image from a book I illustrated a few years ago for author David Rowinski called The Open Pillow. Another style for PPF.


So get going! Draw draw draw with abandon--and help your kids do the same. Before you know it you will have your own amazing style.

xo

Drawn with the Kuretake brush pen.

Friday, January 8, 2016

How To Draw a Fat Budgie

On January fifth we celebrated National Bird Day.

I think it is wonderful to celebrate birds because they have always had a special place in my heart.

When I was a young girl I watched a practically featherless young mockingbird running in the street on a hot summer's day. I heard a crow in the distance and then saw his intentions were not good. After a few failed swoops at the little chicklet I could not take it any more and decided I either needed to find his nest or take him home.

Much to the chagrin of my mother, we ended up taking the little guy home, naming him Peanuts, and caring for the little featherhead for the rest of the summer until he flew away.

Since then I have had many birds: Algebra the budgie, Buddy the conure, Sky, Tweety, Nibble, Speck, Bubble, and Winter. I loved them all.


That being said I thought it would be a good week to learn to draw a fat budgie. The one I drew is much chubbier and more cartoon like than realistic, but I think you will find it fun to draw. Plus chubby budgies are just too cute.

Below is a video to follow--they are pretty simple but their shape takes a few practice runs to get. Don't give up!

Have fun!


xo

Music by loveyoujapan.

I LOVE comments and will visit you right back! Thanks followers!

Drawn with the Zebra fine point brush pen from Jet Pens.

Wednesday, September 23, 2015

KIDS! How to Draw a Slightly Sophisticated Pumpkin for Fall

When I was in third grade I did not like my art teacher but he taught me one thing I will never forget--how to make a pumpkin look like it has dimension.

 That started a whole 3D thing for me--block lettering, perspective--but that is for another post. Back to the pumpkin. 

Like the title of the post says, this pumpkin is a bit more complicated than a cut-out orange circle and black triangle eyes. It shows dimension, color blending, shading, and highlighting. It takes a bit of time, but the results are worth it, especially for kids who like a challenge.


First, lightly draw an oval--any kind will do. Draw lightly at first because you may want to erase the guidelines later. Mine is a bit wide. 

Then draw a slightly crooked rectangle (technically a rhombus) for a stem . 

Starting at the bottom edges of the little rectangle, draw big curved lines to the bottom of the oval, keeping them a bit apart like this. 

As the lines get close to the edge, curve them to the side of the drawing. And then curve them toward the back, like in picture three.

You should see a bit of dimension now.

To make the stem look 3D add a small oval on top to indicate where it was cut. Many times the cut is not perfect so go around the small over and make jagged lines. Then curve the sides of the rectangle in slightly.

Now connect the curved lines at the bottom and the top, and also around the stem to indicate the shape of the pumpkin. Keep these lines pretty close to the original lines, if they are too curved the pumpkin looks fluffy.

These lines makes it more like a pumpkin and less like an oval.


It should look pretty pumkinish by now.

Then erase the original lines.


Notice the curved lines under the stem also. This also adds shape to the pumpkin and makes it seem plump and round.

To color use any paint you like, markers, or colored pencils.


I'm using colored pencils in several shades of yellow, orange, brown, ocher (a brownish-yellow, great for fall), and russet, (kind of reddish-brown). These are Polychromos by Faber-Castell. I LOVE these pencils, BTW. BUY HERE


First color with the yellows. Use the lighter shades first. Then move to light orange.
When shading use slightly darker colors in the creases and lines, and leave an area lighter if you like to show where the sun hits it. The darkest areas will be behind stem, at the bottom, and in the creases on the pumpkin and around the stem 


Light brown can be used to show shadow around the stem, at the bottom, and in the creases. Don't worry, the pumpkin is not perfect. Wavy lines or mistakes can sometimes add to the charm.


Use ocher, russet, and even some greens in the stem. Notice the lines in the stem that add depth and make it look a bit cracked. Some green can also be used in the pumpkin itself.


If you'd like to make your pumpkin into a Jack o'lantern, with a black pencil draw two triangles to indicate eyes. A triangle for the nose draw and a nice wide smiling mouth. You can even add a few teeth.

To add even more dimension, sketch in lines in the triangles on the left side to show depth. It's almost like you can see the inside of the pumpkin. Do the same of the curved side of the mouth and sides of teeth.


Or you can leave it just as you found it in the patch.

Voila! A pretty realistic pumpkin!

Now you can draw a few more--make them tall, or round, or even in different colors. Here is one done by a boy who followed the directions. It looks great, and very different than mine.


Show me what you make and how you decorate with your pictures.

xo 


Sunday, November 23, 2014

Scary Books and KIDS!

When I was in grammar school I loved Where the Wild Things Are by Maurice Sendak. Middle school had me interested in a book called The Active Enzyme, Lemon-Freshened, Junior High School Witch, and high school found me sleeping at the foot of my parent's bed after reading The Exorcist and The Amityville Horror.


My son had a fascination with the Bone series, and my friend's daughter insisted on reading more Neil Gaiman even after Coraline rendered her an insomniac for months.

What is it in horror and the paranormal that intrigues us, even as children?

I am not implying that everyone loves to be scared, but there is surely an attraction.

Another friend's son, at six, filled up her queue at Blockbuster Video with enough Frankenstein and Dracula films to keep them viewing for months. This kid couldn't figure out how to unlock the front door, but he could figure out the computer AND the DVR when he wanted to watch a scary film.


My son read Scary Stories to Tell in the Dark when he was in middle school. He told me it was silly, until he read The Wendigo, then it was nightlights on for a few weeks. 

We were terrified reading shivery, scary stuff as kids, and our kids want those same delightful chills now.

Of course they will read the same things we did like The Witches by Roald  Dahl, all the Goosebumps books, The House With a Clock in its Walls, and Bunnicula, but I've also heard of a few new thrillers. 

For there youngest set there is The Monster at the End of this Book, featuring a Sesame Street favorite, Grover. There is nothing there that will really scare even the smallest of kids, but the idea is exciting to them. 


Middle-grade kids will like The Last Apprentice, a creepy tale of  ghost and witch hunting. Monstrumologist, a Gothic, Dickens-like book about a scientist and his apprentice who find and identify, (and kill if necessary) a variety of monsters, will appeal to the slightly older horror reading aficionados. Miss Peregrine's Home for Peculiar Children is also very popular with high school kids. In fact that book was popular with everyone last year. 

We know kids love horror, and I think I might know why. Kids are relatively powerless. They are told what to do and when to do it, and are afraid of many things--the dark, their closets, mean kids, and even school.

When they read a horror book they meet monsters, crazy teachers, witches, ghosts, and goblins. They get involved in tales about getting lost, eaten, and haunted. Sure they get scared--but they all survive. Every time a kid finishes a scary book they come out the other end, maybe a bit frazzled and scared, but basically unscathed. AND they have slayed a dragon, faced the monster in the closet, and come face to face with their fears, and WON.


Of course we want to protect our kids and keep them safe, but these dark books help our kids meet their own personal monsters--and be the victor! 

So turn down the lights, open your books, and get ready for a night of shivery and spooky fun. There is more to horror than meets the eye!

Quick How To lesson for the kids who love Where the Wild Things Are!