This is the first linky party for all the creative mamas out there. Join in every weekend for the rest of October by placing your favorite craft, recipe, or how-to in the list below. ~ Simply click the linky CLICK HERE TO ENTER link below , follow the simple instructions, and add your information. ~ An image will appear and click through to your blog. ~ Grab the ghostly Weekend Creative Party button to add to your blog to show you participated.
~ The post that gets the most clicks will be featured on Instagram on Monday. ~ I will be tweeting (and I hope you will too!) daily to over 6000 followers on twitter. Join us and add your most creative post and have fun!! xo
When I was in third grade I did not like my art teacher but he taught me one thing I will never forget--how to make a pumpkin look like it has dimension. That started a whole 3D thing for me--block lettering, perspective--but that is for another post. Back to the pumpkin. Like the title of the post says, this pumpkin is a bit more complicated than a cut-out orange circle and black triangle eyes. It shows dimension, color blending, shading, and highlighting. It takes a bit of time, but the results are worth it, especially for kids who like a challenge.
First, lightly draw an oval--any kind will do. Draw lightly at first because you may want to erase the guidelines later. Mine is a bit wide. Then draw a slightly crooked rectangle (technically a rhombus) for a stem .
Starting at the bottom edges of the little rectangle, draw big curved lines to the bottom of the oval, keeping them a bit apart like this. As the lines get close to the edge, curve them to the side of the drawing. And then curve them toward the back, like in picture three. You should see a bit of dimension now.
To make the stem look 3D add a small oval on top to indicate where it was cut. Many times the cut is not perfect so go around the small over and make jagged lines. Then curve the sides of the rectangle in slightly.
Now connect the curved lines at the bottom and the top, and also around the stem to indicate the shape of the pumpkin. Keep these lines pretty close to the original lines, if they are too curved the pumpkin looks fluffy. These lines makes it more like a pumpkin and less like an oval.
It should look pretty pumkinish by now. Then erase the original lines.
Notice the curved lines under the stem also. This also adds shape to the pumpkin and makes it seem plump and round. To color use any paint you like, markers, or colored pencils.
I'm using colored pencils in several shades of yellow, orange, brown, ocher (a brownish-yellow, great for fall), and russet, (kind of reddish-brown). These are Polychromos by Faber-Castell. I LOVE these pencils, BTW. BUY HERE
First color with the yellows. Use the lighter shades first. Then move to light orange.
When shading use slightly darker colors in the creases and lines, and leave an area lighter if you like to show where the sun hits it. The darkest areas will be behind stem, at the bottom, and in the creases on the pumpkin and around the stem
Light brown can be used to show shadow around the stem, at the bottom, and in the creases. Don't worry, the pumpkin is not perfect. Wavy lines or mistakes can sometimes add to the charm.
Use ocher, russet, and even some greens in the stem. Notice the lines in the stem that add depth and make it look a bit cracked. Some green can also be used in the pumpkin itself.
If you'd like to make your pumpkin into a Jack o'lantern, with a black pencil draw two triangles to indicate eyes. A triangle for the nose draw and a nice wide smiling mouth. You can even add a few teeth. To add even more dimension, sketch in lines in the triangles on the left side to show depth. It's almost like you can see the inside of the pumpkin. Do the same of the curved side of the mouth and sides of teeth.
Or you can leave it just as you found it in the patch. Voila! A pretty realistic pumpkin!
Now you can draw a few more--make them tall, or round, or even in different colors. Here is one done by a boy who followed the directions. It looks great, and very different than mine.
Show me what you make and how you decorate with your pictures. xo
A wise person once told me just do it, you never know what will come of it. I heard those words as a young person, and they stuck. Yes, we should make the most out of every situation and try and look to the bright side, but I'm talking about looking at more than just one side of the thing you are doing. For instance, yesterday I went to a conference/meeting of illustrators in Pennsylvania. Needless to say, I did not want to go. I was tired, a bit under the weather, behind in every chore, and just a little crabby. But I paid for it, and I went. The conference was actually great, but there was another side to it that was also great.
The event was located in the middle of a farm that was surrounded by cornfields. Reminded me a bit of New Hampshire. It was overcast, and a storm was brewing in the distance. Some of the dilapidated buildings on the premises looked ominous. It was the perfect setting for a horror story, and the perfect setting for taking pictures.
Although bucolic and lovely in spots, the other areas could have been straight out of Night of the Living Dead, so I snapped away. I did not have a camera, so I used my iPhone. Look for the funny within the serious, the hidden within the obvious, the emotional withing the stoic, or the love within the hate.
To me there are many sides to every moment. Look for them--they are many times better than the obvious. xo
The illustrations in The Very Hungry Caterpillar seem to capture the attention of almost every young child. Simple yet complex, they are colorful and eye-catching. Recreating the look is fun and easy for any child who is old enough to use a pair of scissors.
What you'll need: Several sheets of white paper One sheet of thicker white paper or board Watercolor paints or markers Paint brushes White glue Scissors First, decide what you are going to draw. Feel free to copy my bears, but if you want to draw mice, or bugs, or your family you can.
Then paint several colors of watercolor on the regular paper. The colors can overlap, they can be in patterns, white areas are fine...basically you can't make a mistake. To give the colors even more texture, after the first layer dries choose a different color and make lines or dots. Crinkling up another small sheet of paper or paper towel and dipping it in the paint will create nice textures when softly touched on top of another color.
Using your paintbrush for texture is fun too. When the paint is almost used up on the brush it feels a bit dry and breaks up into sections. Without wetting the brush, dip it into a color and lightly go over another color on the page for a cool lined effect.
I did one page of my first layer of paint in browns and blacks because I wanted to make some trees. To get the spots, dip the brush in black paint, then brush your finger so the paint is kind of flicked off onto the paper. If your brush is too soft, hold the brush over the paper and lightly tap the finger of your other hand so little speckles drop off onto your page. (This method can be a bit messier.) After your pages have dried, begin cutting shapes.
For my picture, I needed three ovals, three circles, for the bears heads and bodies, three very long rectangles for tree trunks in brown, several shorty skinny rectangles for tree branches, and many leaves cut out from all the different colors I painted. I also made six little arms, six little legs, and six little ears, and one big oval in green that will be a patch of grass. I also cut out a butterfly from some of the scraps and some very long curved triangles for grass. (The butterfly is made from two B shapes.)
Please feel free to make your trees, leaves and bears ANY color you like. Don't feel limited to the edges of the paper--go out of the lines!
Now start to glue the pieces you cut any way you like. You can see within the cut out pieces how the white spaces, speckles, squiggles, and paint splashes all add to the texture and charm of the picture. You can copy mine or create your own. I hope I see some mice, cats, dogs, wolves, monkeys, or anything else you can think of.
Send me any of your completed work--I'd love to show it off here! Have fun!! xo
Just because the summer is almost over doesn't mean all the fun has to end.
Here is a quick post to tell you about two awesome drinks I made that are under 100 calories each--and you can share them with the kids! (If you want...)
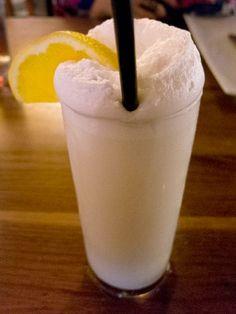
*Coconut Fizzy* Ice Cubes (I fill the glass) Coconut La Croix Seltzer Pineapple Juice Lime 1 tsp. coconut milk or cream per glass (you can also use whipped cream) Fill glass 2/3 of the way with seltzer. (If you have never had La Croix Coconut Seltzer I HIGHLY recommend it. It is somehow creamy all on it's own with NO sugar, NO color, and NO calories. Delicious.) Add about 1/4 cup pineapple juice (or to taste). Add about 1 tsp. coconut milk or cream and stir well. Squeeze a bit of lime on top and add ice. This drink rivals any pina colada I've ever had. Yummmm. (You can also add a scoop of whipped cream on top but that puts it over 100 calories--might be worth it.)
*Creamsicle* Ice Cubes Vanilla Polar Seltzer (another somehow creamy calorie free drink) Orange Juice Vanilla almond milk or soy milk OR 1 tsp. coconut milk Fill glass 1/2 with vanilla seltzer. Fill other half with orange juice. Add the vanilla almond milk, soy milk, or coconut milk and stir well. Light, refreshing, and delicious. Both of these drinks are so much better for you than soda. Coconut cream has EFAs and juices are filled with vitamin C. BTW--2 TBSP of whipped cream only has 16 calories. (You can also make divine whipped "cream" by taking some of the solids off of the top of the coconut cream, adding a bit of sugar and whipping the same way as cream. Yum again. And it's vegan.) Here are the seltzers:
Summer went by too fast! Bring a tiny bit of artsy fun into the classroom with a back to school bookmark for the teacher. For this craft you will need:
Elmer's (or similar) glue Colored Sharpies Thick paper or cardboard in color of your choice Clear plastic sheet First cut out a long book mark shape from the paper.
It can be any shape you like, curvy, swervy, a flower, a lightning bolt, or a rectangle. Just use your imagination and have fun. Cut a window in the paper. Using the paper bookmark as a guide, cut the clear plastic slightly smaller than the bookmark.
Now make any type of stained glass design with the Sharpies that you choose. Flowers, shapes, even just one or two colors looks great. If you are using white paper or cardboard you can color it with the Sharpies too. Take the glue and put a thin line around the clear plastic when you have finished coloring, and glue it on the window.
Viola! You have a beautiful stained glass bookmark lovely enough to grace any book. Have so much fun and please show me the bookmark that you and your kids create. Email to dealenihan @gmail.com. XO
We love our kids. We love 'em when they are tiny and helpless and rely on us for everything. Then they get a bit bigger and we think we are going to get a bit more time to ourselves because someone said that kids can "play on their own" more as they get older. Their attention spans expand and they can entertain themselves. Well--no. When they start to talk and that brain fires left, right and sideways with all the rapid growing they are doing, their favorite thing to say will be MOM. Or Ma, Momma, Mommy, or Mum. The first time you hear Mama out of those teeny bow lips will be one of the most memorable days in your life.
Fast forward a year. They will use it hundreds of times a day. And it will still be wonderful to be a mom. But there will also be times you want to pull your hair out of your head. You are the first person that means everything to them--but that does not mean that you should let yourself go insane. You will feel like no one can care for your child as well as you can--and you are right. No one will have that incredible connection. And that is FINE. They need to get out in the world a bit, experience new things, and have some fun--just like you do.
It does not have to be every day, but often enough that you have something to look forward to every week. Get a manicure--or get together with a friend and give each other mani/pedis. Stop at Starbucks on the way home for a treat, and have a probably much needed free girlfriend therapy session. Or simply go somewhere and read--ALONE. It does not really matter what you do, as long as you fill your tank when the fuel gets low. They tell you on a plane if (GOD FORBID) the oxygen masks fall that you should take care of yourself before any children. It's the same thing--you are no good for anyone--including yourself--if you have nothing to give. So go out and fill your tank. Have some fun. Then spread that sunshine around. Come back on Wednesday--I will have a craft for the kids for these last few days of summer. XO
Today is a great day to get out the paints and make a beautiful picture with FINGERPRINTS!
All you need is watercolor or acrylic paint--and fingers :) Just dip you finger into the paint and press onto paper. You can do just one or dozens. Make bugs, animals, monsters, or anything else you can dream of.
Contact me when you are done and I will post them HERE.