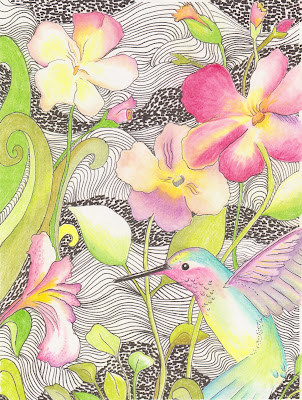
Featuring colorist Ronda Francis

Showing posts with label artist. Show all posts

Tuesday, December 5, 2023

Have You Ghosted Your Art?

You've always wanted to create.

You felt you had an artistic side that was never allowed to see the light of day.

You had so many ideas you didn't know what to do with. You were bursting at the seams.

But you had to deal with the grind. You woke up, went to work or school, came home, slept, and did it all again. And again. 

Was there time to be an artist?

You weren't sure, but you had to try.

You found a little time here and there. Sometimes on the weekend, sometimes after work. Or maybe before work. It wasn't about money--you just wanted to do it for the love of painting or drawing or writing.

Maybe you set up a corner in your house with your supplies; easel, paints, pastels, drawing table, or writing desk. When you went out, your bag was full because you carried your sketchbook everywhere you went.

You got into a groove. 

You looked forward to that special time with your muse. Maybe you made some tea or coffee. Turned on your favorite music. You connected to the spirits of creativity and couldn't believe it was 4 am when you finally, covered in paint and exhilarated, put down your paint brush.

Sometimes your went to school or work exhausted, but it was worth it.

You found some "real" artists on social media. Their work was admirable. They had opinions about how to do art the right way. You must:

   • Fill a sketchbook every month.
   • Draw at least two hours a day.
   • Take a class. Or two. Or three.
   • Sign up for social groups with other artists.
   • Write 2,000 words a day.
   • Join Instagram, Facebook, and the social media site formerly known as Twitter
   • Start a blog and record everything you do for YouTube.
   • Have a gallery show within a year or else...

...you're not really an artist.

These suggestions can be important and helpful individually, but the world wide web dumps everything on us at once. Sometimes it's hard to know where to start and with what. 

So you followed and felt inspired...kinda.

By default you made some friends in the art world. 

You shared manuscripts or critiqued one another's art.

You started a few projects.

And then your friend got a publishing deal. Or a gallery show.

And you were over it.

Well--maybe not completely over it, but dread crept into the scenario. You felt a tap, tap, tap on your shoulder and the little voices began to ask...is this what you really what you really want to do with your time?

Suddenly you don't want to be an artist at all.

The magic vanished, and it was replaced with anxiety. 

So you ghosted your practice.

And it felt great.

You didn't feel guilty about not meeting the important art milestones social media had imposed. You got more sleep. And you were happy to see the friends and family that you had been neglecting because of your hobby.

You didn't want to even look at the painting you started. Or read your partially completed manuscript. You worked so hard on them! But it felt rebellious to ignore them...like homework you got away without doing.

You had brunch at the cafe, talked on the phone until your battery died, and admired your neat(ish) house.

A few weeks later you found yourself watching Seinfeld reruns and shopping on Amazon. Your artist's voice spoke to you again and asked why watching television was better than your art. Leave me alone! you thought. I'm calm.I'm relaxing! But as you walked past your art supplies or laptop, you felt a little tug at your creative heart.

But it was a tiny little yank--and it was easily ignored.

You didn't get an agent. Or a gallery show. Your friend did. 

(Even though she'd been practicing her craft for the past 20 years, you disregarded that logic for the time being.)

And you continued to ignore your calling for a few more weeks--or maybe months. You also ignored the gurus.

And you felt renewed...

...except for the fact that you desperately missed drawing. Or painting, writing, or sculpting.

So you started again--but this time you ignored the voices that made you feel less...they didn't do it on purpose after all. 

This time you take it slow.

You take your time and you get better at your art at your pace. You get better because you can't help but improve if you keep going.

One day you finish your first portrait or manuscript or drawing. 

It's not perfect, but it's yours, and it's done. 

And you can't wait to start the next one.

Just know that you'll probably hit a wall somewhere along the line in your art journey--and it's fine. In fact--you'll hit many. It's okay to stop and start again. You're not a failure. Take your time and enjoy every minute...even the imperfect moments. 

Listen to your muse...she's talking to you.

XO

(That voice that pulls you away from your destiny, according to Steven Pressfield, is called resistance. 

Read more about this amazing and terrible force in THE WAR OF ART.

And get creating.)


Wednesday, March 1, 2017

Squirrel Appreciation Day 2017!

Awww Willow!
Some of you may know that I have a God-squirrel named Willow. 

Willow fell from a tree as a four week old baby five years ago. Thankfully he ended up with a licensed animal rehabber who took him in and nursed him back to health. Circumstances did not allow him to be re-released as usual, and he lives in her home, cage-free to this day.

He is adorable, and active, and smart as a whip...and he wreaks havoc on her home daily. He thrives because he is with a professional rehabber. I would not suggest trying to raise one or keep one for a pet yourself. They live about 20 years in the wild, and only 5 years in cage. :( Willow has run of the house, and has chewed endless cords, molding, furniture, cabinets, and a few potentially dangerous items. Take my word--leave it to the pros. 


That being said, Willow inspires me all the time. He is a beautiful thing, partially due to genetics, and partially, I am sure, due to his perfect diet. As Willow's mama says, he is the Brad Pitt of squirrels. 

He is going to appear on my Etsy site soon, as an original graphite drawing, then as a limited edition of reproductions.


Click here to see him in my Etsy shop.

He is so pretty, I draw him all the time. 

Happy Squirrel Appreciation Day, about a month late. ;)

Tuesday, December 27, 2016

What Coloring With One Graphite Pencil Taught Me

I was tired after Christmas, but not tired enough to fall asleep.

Watching TV is never enough for me on its own, so I either doodle, draw, write, or...you get the idea.

But I was determined to take the day off, so as I was watching The Sopranos then The OA, I picked up one of my own coloring books and a pencil.

At first it was a bit like doodling on a newspaper or magazine, and I had no predetermined outcome on my mind. I just wanted to relax.

Then I got into it.


Picture as seen in coloring book.

Colored with one Pentel GrapGear500 0.3 2B lead

The pencil is a mechanical is a GraphGear Pentel 500 with 2B 0.3 lead. You can buy it here: Pentel GraphGear 500 Automatic Drafting Pencil Brown (PG523E) 

The book is Coloring Dreams. It is printed by CreateSpace and has 14 one sided images. You can buy here:  Coloring Dreams: 8 x 10 Version with Borders

 I learned that using just one pencil is not only enough to color, it is super relaxing. (I found it to be even more relaxing than using colors, and can be just as striking.)

I learned to appreciate the images in a coloring book as art, and how to use shadows and light to make the image stand out, and even look beautiful.

I learned that 2B lead has a huge variation in depth of color, and that I love to use softer lead.

I also learned that if the lead is thin enough you can use a softer lead in a mechanical pencil and get a big variety of results.

I am not saying to get rid of your colored pencils, but maybe to give this a chance.

I loved it.


Wednesday, December 14, 2016

The Top FIVE Coloring Mistakes and How to Avoid Them

From COLORING DREAMS Coloring Book
We are still riding the adult coloring wave, and it does not look like it will crash anytime soon.

From cute fairies to exotic fantasies and explicit curse books, we can't get enough of our favorite new past time.

But are there certain things to avoid in the relaxing coloring world?

*DISCLAIMER* Coloring is just plain old fun. If you are doing it, having a ball, and do not want to change a thing--keep on coloring! Read on, what I write might surprise you.

Do you:

1.  Use the same pressure on every area when using colored pencils?
 Some color with a light touch and some are heavy handed. If you want an artistic look to your pictures, vary the pressure you use. Pressing very hard gives a very bright, opaque finish to the area you are coloring. If you press very hard you will burnish the area which means there will be a shine or gloss to the area you are coloring, and any tooth on the paper will be flattened. This technique is great for some areas, not for others. Don't be afraid to experiment. Pressing lightly gives the area a more translucent feel, and layering with color and even texture is possible.

2.  Color in every single space on every single picture?
Occasionally you will be stuck to figure what color to use. This might mean that you don't need any color at all, and the space should be left white. Some pictures look gorgeous with every area filled in with bright and vibrant colors--but some do not. Sometimes the negative space around the subject of the picture helps the focus to remain on the subject. Other times the negative space may be an interesting design itself. 

3.  Only color what you already like?
When we are kids, we are fearless and we learn what we like from trying practically everything, at least once. As we get older, we fall into patterns and feel we already know what we like, and do not like. I spoke to some colorists recently, and many said they didn't think they would like to draw people, or houses, or any number of things, and when they tried, they loved it! So give it a whirl. Throw yourself at some new coloring themes and see where you stick.

4.  Have the feeling that more is better?
How would it feel to have an endless supply of colored pencils or markers? Or enough gel pens to cover an entire wall? Sounds divine. Sure having a choice is nice, but having a smaller amount can be wonderful, too. When I illustrated a children's book many years ago, the only thing I used to color it was a set of 24 Conte charcoal pencils. It got published, and spent one lovely weekend featured at The Eric Carle Museum of Storybook Art. Practice blending colors. Using a blending stick or turpenoid helps too. You may surprise yourself. Also, having less pencils is a great study in color theory. You are forced to make new shades out of necessity, and the skill translates when you have even more pencils. Oh, the colors you will create! (Now that being said--I think almost everyone agrees the seemingly endless choices we have in coloring books styles is GOOD.) You can try this too: choose three or four colors and finish the entire picture using only the colors chosen. You may be in for a treat if you have not done this before. (BTW--my coloring book COLORING DREAMS is based on the children's book I illustrated.)

5.  Try to make every image perfect?
Yes, there is beauty in photo realism--to have that wonderful ability to recreate what already exists. But there is another kind of awe in creating something that has never existed before. Use your imagination--no one is stopping you. If you color, you are an artist, and you can use your creativity in any way you like. Unlike a job or a duty, coloring is YOUR thing, and you can create any world you like. If it makes YOU happy, DO IT. No one gets hurt here, and in my humble opinion, putting a smile on your own face helps you spread the joy. Even if you are not the best colorist on the earth,(there is only one and no one knows who that is) do what thrills you. Everything has cracks--that is how the sun gets in. (Leonard Cohen)

Even though I named this article The Top Five Coloring Mistakes, in reality, I truly do not think we can make mistakes when we color. We may learn what we like to color, or what pencils are our favorites, and even new techniques, but one of the truly beautiful things about coloring is that there aren't really any terrible mistakes, just things we might learn. 

Now go grab your pencils, I have wasted enough of your coloring time.

xo

You can buy COLORING DREAMS HERE.


Click HERE for my website and see my additional coloring books.

Join my newsletter HERE for coloring tips, once a month free pages, giveaways, and educational and product videos.

Join my Facebook COLORING GALLERY to post your coloring pages and receive motivation, tips, and a great coloring family HERE.

Friday, August 5, 2016

Drawing vs. Writing--Which One is YOUR Thing?

As an author and artist I spend much of my day either imagining then sketching images, or thinking about a story and then writing it down before it fades into the ether.

Someone asked me recently which I prefer to do, and initially I was a bit befuddled. I've been doing both since I was a young child (like most authors and artists) and had to really think.


But I have an answer.

If I had to do ONLY one for the rest of my life, I would have to choose writing. 

My posts and pages on Facebook and my blog are filled with my art, but I get a more fulfilling buzz from words. The images are great attention getters, and I am happy to share them.

I find drawing satisfying, especially when the picture is done. I can hold a conversation while I draw, and funny enough even watch TV (something I rarely do anyway). But there is something missing.

When I write I am almost completely absorbed. Time flies, and I get the feeling I am a bit lost, which I love. I get to create worlds and people, and it feels like a special privilege. It is magic.

My stories are almost never exactly right on first draft, and I even like the rewrite part--it feels like a puzzle, and each fix feels like another reward.

I usually have ideas to go with the stories--what the people look like, the settings, and I am happy to sketch them out, but once that part is finished there is a pull, and it is usually another story clawing its way to the surface.

Creepy Carrots--I am in love with the illustrations by Peter Brown. Peter, if you are reading, boy do I have a book for you!
 It would be a wonderful thing to write a story and have a fantastic artist flesh it out and make it a thing of beauty. I recently did some sketches of one of my characters and a wonderful artist did them in digital, and I was amazed. I have every digital do-dad there is, but I can't recreate what she did.

That is not to say that I will never write a book and illustrate it myself, but from now on I will really think it over, and if my art fits, then it's off to the races, but if I think someone else could elevate my books and stories even more, then I will gratefully turn it over to another more suited talent, and anxiously wait for the stunning results.

We can't be and do everything--we have to pick OUR thing and run with it. Get better at it, then eventually get great.

This realization was freedom to me, and I have renewed energy about my work that I haven't had for some time.

Disney had it right when Elsa sang Let It Go.

xo


Sunday, July 31, 2016

Tea, Coffee, Soda...What Do YOU Drink During the Day?

If you are anything like me, you spend at least part of your day sitting in a chair behind a desk.

Although I do not drink coffee first thing in the morning like most of the world, by two o'clock in the afternoon my body is crying for caffeine.


For me this caffeine fix comes in the form of tea. I feel there is something magical even in the ritual of the brew.


My fave is black tea, although I know plenty that drink green, white, or herbal tea these days.

I love chai, but I seem to favor it in the winter, and I prefer iced tea in the summer.


My jolt of choice used to be Coke, but after realizing it had far too many calories, and was possibly causing me to gain some weight, I dropped soda altogether, and hopped on the tea wagon.

The most consumed drinks worldwide are:

1. Coffee
2. Tea
3. Orange juice (this surprised me)
4. Beer
5. Coca Cola
6. Wine
7. Vodka
8. Energy drinks

Where is water?

I know many sit at a desk for work, to color, to write the next bestseller on the New York Times list, or even pay bills--and I am curious--what do you drink during the day? If you have any tea faves I'd LOVE to know.

xo


Thursday, June 9, 2016

Cintiq vs. Surface Pro vs. iPad Pro IMHO

(Spoiler alert: I am not trying to find an all-in-one to get digital drawing and a laptop in one. I do not own the iPad Pro yet.)

As an illustrator I use paper and pen virtually all day. 

I sketch my images first with a 2H Staedtler pencil, then go over the whole thing with a Micron, brush pen, or crow quill, dipping every 10 to 20 seconds--and praying that I do not mess up the entire time.

I love to draw, but inking is scary stuff.

A few years ago I got a 13 inch Cintiq and had big dreams of transitioning from pen and pencil at least part of the time. Fast forward to today, I still have issues.


But I am getting ahead of myself here--back to inking.

Sketching is great because of erasers. But inking makes things real, real fast.

I have screwed up too many images than I care to remember, and I DO NOT like to start over. Ink blotches, hand shakes, and just outright mess-ups are inevitable, but then some of the magic is gone and I am aggravated.

Thus the Cintiq.


In my head I could mess up all I wanted, correct it, start some areas over...you get the picture. The reality was a bit different. 

I love the actual drawing area of the Cintiq. The surface has a slightly scratchy feel, not unlike a piece of nice drawing paper. The pen itself has buttons on it that are supposed to reduce the back and forth motion of changing modes, pens, tips, etc., but I found then to be a bit cumbersome. I accidentally click them often and wish they were not so close to the tip. And speaking of the tip, there is a gap between where the tip touches the screen and the line or stroke created. My Cintiq connects with cables to my laptop and to a wall socket. Again, kind of cumbersome. Also, the 3 in 1 cord has died several times and when I try to repurchase it has been on back order for weeks and weeks, leaving me with no Cintiq. I use Photoshop with the Cintiq, and find it counter intuitive.  

I eventually went back to paper, pen, and pencil, but my original issues still bothered me.


Back to the store. I tried the Surface Pro after several designers told me it is what their companies supply them with to work. I found it similar to the Cintiq in drawing capability, but with a smaller screen. I also realized it is probably great for work because it is also usable as a laptop--no need to connect your device to another device with wires. It also uses Photoshop.

Then I tried the iPad Pro with the iPencil and it seems to be exactly what I was looking for. With many apps to make drawing, sketching, editing, and designing simple, it feels like this will be the answer to my Photoshop dislike.


There is no space between pencil tip and drawing mark. There is no lag and no visible pixels, even when I make images bigger to correct a mistake. I can easily smooth lines and correct. The iPencil, (although a separate purchase) is a great size, feel, and weight. It charges super fast. Be aware that the iPad Pro cannot handle tiffs, and has no place to store or connect the pencil. The surface is as smooth as glass, so there is no nice scratchy, paper kind of surface feel. It is light, super portable, and uses no cords. The 12 inch surface is big, and when I rested my hand there was no interference at all, the iPencil kept working fine.

I will purchase the iPad Pro today and do an updated review after I use it for a week. 

I have also discovered some very cool apps for creating and coloring. See you in a week!

xo


Sunday, May 1, 2016

Congratulations CORRINA LORRAINE! Winner of the Coloring Dreams Giveaway!

I am happy to announce the winner of the Coloring Dreams giveaway is CORRINA LORRAINE!

She will receive the first copy of Coloring Dreams, and a 24 set of Prismacolor pencils.


Please stay tuned! Coloring Dreams is the first book in The Coloring Club, where members receive a beautiful coloring book by artist Dea Lenihan delivered right to the front door, along with an art supply that is suited to the book of the month. 

So once again--CONGRATULATIONS CORRINA!

P.S. Please keep on eye on your email--everyone that entered is getting a small gift from me. 

xo Dea


Wednesday, March 2, 2016

Artists, Watermark Your Work

As artists we realize the importance of sharing our work, and we also realize the danger.

We create original pieces, and are always at risk of someone taking advantage and using them without our permission.

I found several watermark companies today, and after trying them, I found that for the work I am doing now, Visual Watermark is the easiest to use, and the trial period is free. After that, there are three levels to purchase, ranging from a one-time payment of $19.95 for one computer to $39.95 for up to ten computers.


Visual Watermark walked me through every step, from download to watermark image storage. 

I chose to use my name and a relatively transparent watermark. You will be able to choose the transparency, font, color, and design for your watermark.

You can also create a watermark in Photoshop or Illustrator if you have them, although you would not be able to do a large amount at one time.

We should also share our work on social media on low resolution, so a reproduction would be very difficult, if not impossible.

Our work is valuable, and we should do all we can to keep it safe.

Find Visual Watermark HERE.

Here is a link to a post of Nine Best Software To Ad Watermarks. I tried them all. CLICK HERE

Tell me what you think!

xo 

Monday, February 29, 2016

Congratulations to our February Giveaway Winner!

Our February Six Shades of Grey Faber-Castell PITT Artist Pens winner is RUY MORRIS!


Congratulations!

Thank you to everyone who participated.

Our new giveaway will be listed tomorrow ~ I have a feeling it will be a favorite to those who like art and to be pampered a bit.

Congrats again Ruy!!

xo

Monday, February 1, 2016

February Art Giveaway ~ Six Shades of Grey PITT MARKERS by Faber-Castell

Happy February! The groundhog says we are to expect an early spring!! XO


Although it is the shortest month of the year, there is still plenty going on.

This month we are a set of Faber-Castell PITT artist pens in SIX Shades of GREY. These are terrific for cartoons, manga, architectural design and any kind of sketching you can think of! 


Grey is interesting, and most think of grey as one color. But all my art friends will know that grey can be cool, warm, or even neutral. The PITT Faber-Castell pens are permanent and water resistant.


\
I love black and white and grey--and I hope you do too. 

Good luck! 

Enter below.

xo


a Rafflecopter giveaway

Sunday, January 31, 2016

Congratulations to Our Brush Pen Giveaway Winner!

Congratulations to our Jetpens Brush Pen Giveaway! 


I would like to thank all of you that entered the contest, tweeted, and signed up for my blog.

I hope you will all enter February's contest, the Faber-Castell Six Shades of Grey Artist Pen Giveaway.


Again, congrats Barrie!

xo


Wednesday, January 13, 2016

Yes! You CAN Make Money as an ARTIST and Be Happy

We all want our children to be happy and successful. We want to give them every opportunity and help them find the "thing" that they were made to do.

Many are especially happy if their children decide to become something professional, like a doctor or a lawyer. Getting into finances is smiled upon by many because it is assumed a good living will be made. 

Then there are the careers that parents are not thrilled about. There are plenty I do not have to mention, but sadly some of them are in the field of the arts. 

The term starving artist certainly came from somewhere, but happily a passion for the arts does not mean your child will be destitute and destined to live in your house until they get a real job.

Here are some jobs in the art field that make a very good living:

Graphic Artist - The average yearly income for a graphic artist is over $46,000. 

Fine Artist - All told, illustrators, sculptors, photographers, and painters made an average of $53,200 per year. (According to Google, if you live in Delaware you will hit the jackpot in this field, earning over $133,000.) Not bad.

Video Game Designer - Many hate that their kids are fascinated by video games. They should not feel too bad if their child decides they want to design these games for a living because the average salary for someone designing these attention-grabbers is almost $87,000 a year. 

Book Illustrators - Do your kids doodle all over everything? GOOD. If they decide they want to illustrate books for a living they can earn $53,000 a year or more. Medical illustrators make even more, starting at $61,000, and some making upwards of $250,000. 

Courtroom Illustrator - For those interesting in law AND art, earning $42,000 to be a courtroom illustrator is the perfect answer.

Storyboarding - Almost all films are made using a storyboard artist to plan the shots before filming. Film storyboarders can expect to earn over $84,000 a year, those in advertising around $64,000.

And there are more. Fashion illustrators, comic book artists, forensic artists, architect, tech designer, car designer, special effects expert, potter, jeweler, playground or golf course designer, landscape architect, art directors, and clothing designers can all make wonderful livings, and the list goes on.

So have no fear if your son or daughter decides on the arts, have no fear. Help them out by showing them websites dedicated to the arts, taking them to museums, or local shows. Even if you are not an artist yourself you can ask about their interests and find out about what they love.

Following a dream to a career is one of the most fulfilling things that can happen to a person. According to Maslow it is a peak experience. The ones that support and assist and help these dreams come true are real life angels.

So let them be artists--in fact help them become artists. Because we all know the EARTH without ART is just...eh.

xo

Wednesday, December 9, 2015

ART ~ It's In the Genes

My mother started to get grey hair when she was 16 years old, and people tell me I look like her. She has pure white hair now, and so do I. I did not pick up her flair for really good cooking unfortunately.

My father is a wonderful photographer, and although I like taking pictures and some of them are very cool too, I do not have his skill or his knowledge. But I did get his very long legs. 

Both of my parents are artistic. My mother used to oil paint when I was a kid, and my dad would draw pictures of eyeballs running down the street and rising like the sun that would rival Dali in style.

My sister does not think she draws well, but she has other artistic skills. She is an amazing interior decorator, and can host an event that would Martha Stewart jealous.
Pastel by great-grandpa Paul.

I am starting to learn that the artistic thing goes back beyond my parents. Seems I had a great grandfather that had a flair for art also.

We found his portfolio that is so old it is crumbling, and we are going to try our best to salvage and frame some of the artwork. It ranges from cartoons to oil paintings.

If both your parents have blue eyes, the chance that you will have blue eyes too is very high. I wonder what the genetic chance is in becoming artistic if there are artists in your family?
One of his cartoons.

According to a study at Penn State artists are both born and made. They feel natural born talent, along with societal influences, shape the artist.

In any event, it can't hurt to draw and paint with your children if they love it. And doing art helps them with critical thinking, decision making, and self confidence--so go for it!

So I wonder, did my love of art come from my parents drawing with me as a kid, or did I inherit it in my DNA?
xo

Thursday, October 22, 2015

Working on a Book


My version of Old Barney in LBI--haunted.
The shivery Halloween season is upon us, my favorite time of year.

Although it won't be ready this year, I am working on another book for kids.

I used to love spooky books as a girl, and now I am just as thrilled to write them today.

So here's the thing: like many authors, I'm sure, the ideas for books come to me rapid-fire. I write them in notebooks, dictate them to Notes in my iPhone, or scribble them where ever I can--napkins included.

At home I quickly type the first draft into Word before I forget the feel of the story.

Then comes the hard part.

For me, the illustrations grind the creative process to almost a halt. It's not that I don't have the pictures in my head that go with the story, but the pictures seem to take a loooong time. Even compared to edit after edit of the writing, the drawings drive me nuts.


Penelope the Witch from a soon to be book.
To make it even more weird, I love to draw. If one of my books was being illustrated by someone else I am sure I'd feel odd about it. (If someone's style fit my story I would consider it--but I'm sure I'd still prefer to do it myself...I think...)

Anyway--I think the writing occupies my mind in a certain way that allows the time to seamlessly go by. When I draw I can think too much--the wash, dishes, MORE STORIES.

I just decided I am either going to start listening to music while I draw, or maybe digital books.

Sometimes this blog is better than therapy.

xo 

Saturday, October 10, 2015

I Learned Something New Today--Bokeh!

Yesterday I posted a portrait onto Kim Dellow's #ShowYourFace Challenge. 

My image is done with Faber-Castell Polychromos pencils, and shows some light circles in the background. 


BOKEH bubbles in the background. (Pardon the alliteration)

Yes it is my own work, but I have to say love the way the background turned out. A few people commented on the image and said they loved the background too, and said it was BOKEH.

I had never heard the word before. I had seen the diffused kind of reflected light in photos, but I did not know there was a word for it. The definition of bokeh is: the aesthetic quality of the blur produced in the out of focus parts of an image produced by a lens. Also--"the way the lens renders out of focus points of light".

I think these bubbles may be my new favorite thing.

xo


Wednesday, September 23, 2015

KIDS! How to Draw a Slightly Sophisticated Pumpkin for Fall

When I was in third grade I did not like my art teacher but he taught me one thing I will never forget--how to make a pumpkin look like it has dimension.

 That started a whole 3D thing for me--block lettering, perspective--but that is for another post. Back to the pumpkin. 

Like the title of the post says, this pumpkin is a bit more complicated than a cut-out orange circle and black triangle eyes. It shows dimension, color blending, shading, and highlighting. It takes a bit of time, but the results are worth it, especially for kids who like a challenge.


First, lightly draw an oval--any kind will do. Draw lightly at first because you may want to erase the guidelines later. Mine is a bit wide. 

Then draw a slightly crooked rectangle (technically a rhombus) for a stem . 

Starting at the bottom edges of the little rectangle, draw big curved lines to the bottom of the oval, keeping them a bit apart like this. 

As the lines get close to the edge, curve them to the side of the drawing. And then curve them toward the back, like in picture three.

You should see a bit of dimension now.

To make the stem look 3D add a small oval on top to indicate where it was cut. Many times the cut is not perfect so go around the small over and make jagged lines. Then curve the sides of the rectangle in slightly.

Now connect the curved lines at the bottom and the top, and also around the stem to indicate the shape of the pumpkin. Keep these lines pretty close to the original lines, if they are too curved the pumpkin looks fluffy.

These lines makes it more like a pumpkin and less like an oval.


It should look pretty pumkinish by now.

Then erase the original lines.


Notice the curved lines under the stem also. This also adds shape to the pumpkin and makes it seem plump and round.

To color use any paint you like, markers, or colored pencils.


I'm using colored pencils in several shades of yellow, orange, brown, ocher (a brownish-yellow, great for fall), and russet, (kind of reddish-brown). These are Polychromos by Faber-Castell. I LOVE these pencils, BTW. BUY HERE


First color with the yellows. Use the lighter shades first. Then move to light orange.
When shading use slightly darker colors in the creases and lines, and leave an area lighter if you like to show where the sun hits it. The darkest areas will be behind stem, at the bottom, and in the creases on the pumpkin and around the stem 


Light brown can be used to show shadow around the stem, at the bottom, and in the creases. Don't worry, the pumpkin is not perfect. Wavy lines or mistakes can sometimes add to the charm.


Use ocher, russet, and even some greens in the stem. Notice the lines in the stem that add depth and make it look a bit cracked. Some green can also be used in the pumpkin itself.


If you'd like to make your pumpkin into a Jack o'lantern, with a black pencil draw two triangles to indicate eyes. A triangle for the nose draw and a nice wide smiling mouth. You can even add a few teeth.

To add even more dimension, sketch in lines in the triangles on the left side to show depth. It's almost like you can see the inside of the pumpkin. Do the same of the curved side of the mouth and sides of teeth.


Or you can leave it just as you found it in the patch.

Voila! A pretty realistic pumpkin!

Now you can draw a few more--make them tall, or round, or even in different colors. Here is one done by a boy who followed the directions. It looks great, and very different than mine.


Show me what you make and how you decorate with your pictures.

xo 


Friday, September 11, 2015

Make a Picture Like Eric Carle ~ Kids Can Create a Picture Collage

The illustrations in The Very Hungry Caterpillar seem to capture the attention of almost every young child.

Simple yet complex, they are colorful and eye-catching.

Recreating the look is fun and easy for any child who is old enough to use a pair of scissors.


What you'll need:

Several sheets of white paper

One sheet of thicker white paper or board

Watercolor paints or markers

Paint brushes

White glue

Scissors

First, decide what you are going to draw. Feel free to copy my bears, but if you want to draw mice, or bugs, or your family you can.


Then paint several colors of watercolor on the regular paper. The colors can overlap, they can be in patterns, white areas are fine...basically you can't make a mistake. 

To give the colors even more texture, after the first layer dries choose a different color and make lines or dots. Crinkling up another small sheet of paper or paper towel and dipping it in the paint will create nice textures when softly touched on top of another color.


Using your paintbrush for texture is fun too. When the paint is almost used up on the brush it feels a bit dry and breaks up into sections. Without wetting the brush, dip it into a color and lightly go over another color on the page for a cool lined effect.


I did one page of my first layer of paint in browns and blacks because I wanted to make some trees. To get the spots, dip the brush in black paint, then brush your finger so the paint is kind of flicked off onto the paper. If your brush is too soft, hold the brush over the paper and lightly tap the finger of your other hand so little speckles drop off onto your page. (This method can be a bit messier.)

After your pages have dried, begin cutting shapes.
For my picture, I needed three ovals, three circles, for the bears heads and bodies, three very long rectangles for tree trunks in brown, several shorty skinny rectangles for tree branches, and many leaves cut out from all the different colors I painted. I also made six little arms, six little legs, and six little ears, and one big oval in green that will be a patch of grass. I also cut out a butterfly from some of the scraps and some very long curved triangles for grass. (The butterfly is made from two B shapes.)


Please feel free to make your trees, leaves and bears ANY color you like. Don't feel limited to the edges of the paper--go out of the lines!


Now start to glue the pieces you cut any way you like. You can see within the cut out pieces how the white spaces, speckles, squiggles, and paint splashes all add to the texture and charm of the picture. You can copy mine or create your own. I hope I see some mice, cats, dogs, wolves, monkeys, or anything else you can think of.


Send me any of your completed work--I'd love to show it off here!

Have fun!!

xo